PATTERN + TUTORIAL: Wedged In Sampler Square
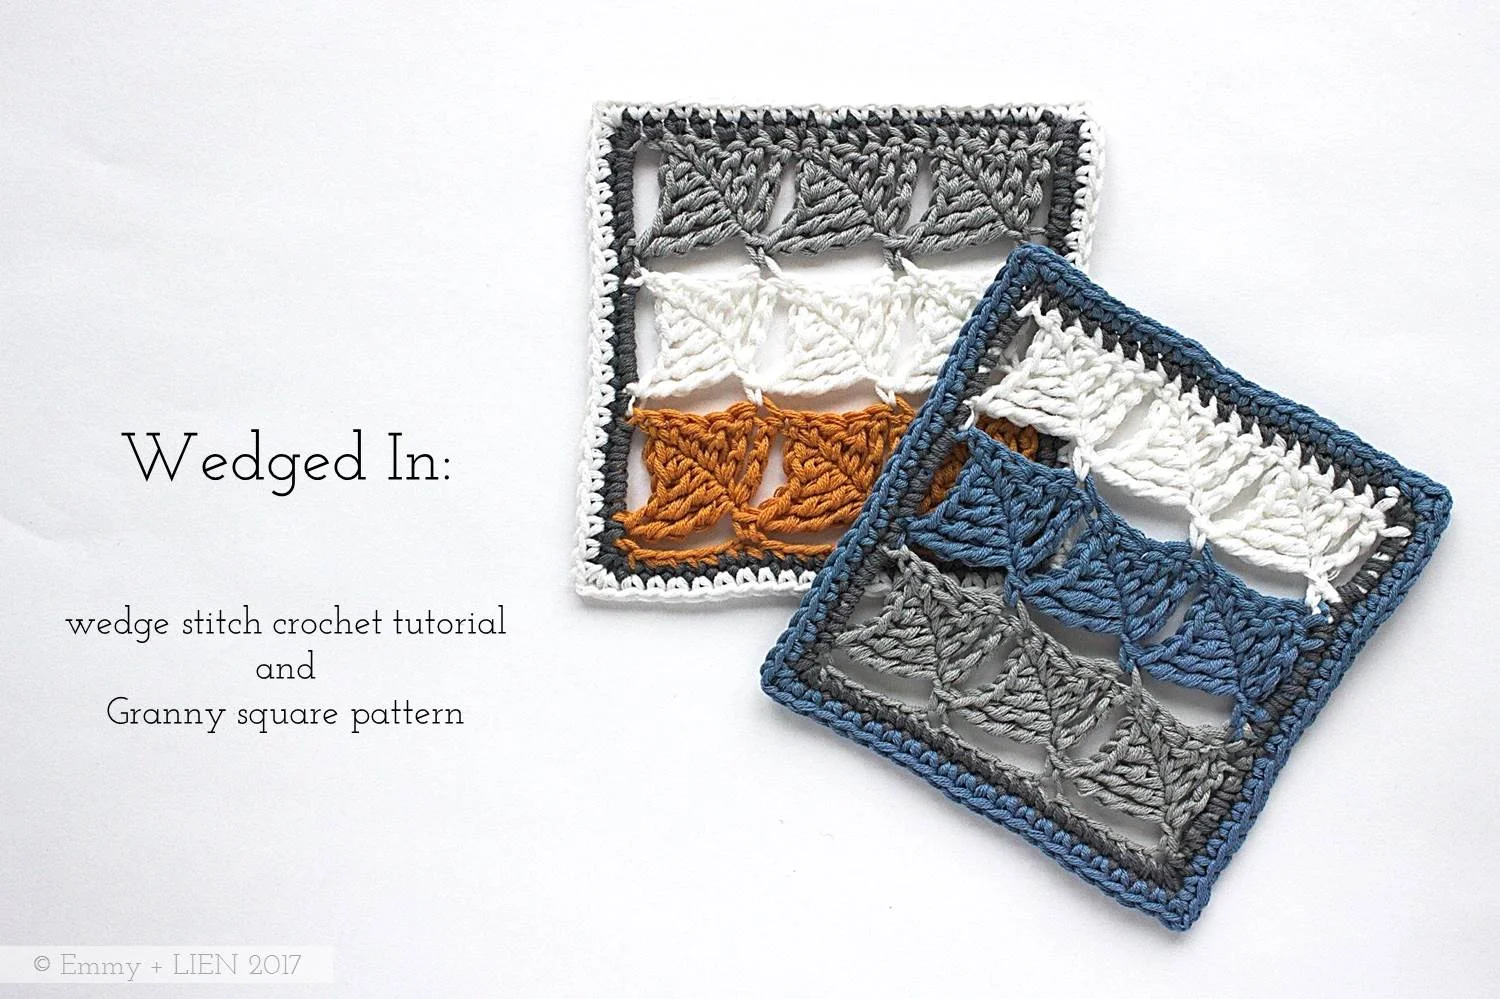
In this tutorial I will show you how to crochet the Wedge Stitch. It's a beautiful stitch that seems to float within the edges of the fabric, creating a loose structure with a wonderful drape. It's perfect for things such as shawls, blankets, bedspreads, etc. I've used it in the Window into Window shawl, and these little sampler squares will end up in my Crochet meets Patchwork Blanket.
The wedge stitch is worked over two rows using stitches of increasing height to create a distinctive diamond or “wedge” shape. It grows reasonably quickly and is much less complicated than it looks - if you know how to extend the basic triple crochet (double crochet in US terms) to make it taller, you can do the wedge stitch.
Any yarn type and weight will work for this stitch. It looks particularly striking when you change colour every two rows, as I've done for these samplers, though any solid, semi-solid or variegated colours will look good too. It's best not worked too tightly, and the work must be blocked properly at the end to open up the stitches.
Materials
3.0mm and 2.5mm crochet hooks
4-ply yarn (for the photos below I've used DMC Natura Just Cotton in Gris Argent (A), Blue Jeans (B), Ivory (C), and Aswan (D))
tapestry needle
Stitches + Abbreviations
ch – chain
DC – double crochet
HTC – half treble crochet
PUL - pull up a loop
RS – right side
sl st – slip stitch
TC – treble crochet
YO - yarn over
Special Stitches
DTC – double treble crochet: YO x2, insert hook in next st and PUL, [YO and draw through first 2 loops on hook] x3.
TTC – triple treble crochet: YO x3, insert hook in next st and PUL, [YO and draw through first 2 loops on hook] x4.
2TTCtog - 2 triple treble crochet together: *YO 3x, insert hook in next st and PUL, [YO and draw through first 2 loops on hook] 3x; repeat from *, YO and pull through all 3 remaining loops on hook.
Finished Dimensions
10 cm x 10 cm
Difficulty
Confident Beginner to Intermediate
Notes
- This pattern uses UK crochet terms. For a UK to US crochet term conversion chart, see: http://www.simplycrochetmag.co.uk/2013/07/04/uk-and-us-crochet-conversion-chart/
- Unless otherwise stated, turning chains do not count as a stitch.
- For smooth colour changes, add the new colour on the final step of the last stitch of the previous row.
Instructions
With colour A and larger hook, ch 20, turn. DC 1 in 2nd ch from hook, then * ch 6
DC 1 in 2nd ch from hook, HTC 1 in next ch, TC 1 in next ch, DTC 1 in next ch, TTC 1 in next ch, skip 5 ch, DC 1 in next ch; repeat from * to end. Turn.
R2: ch 5 (counts as 1 TTC), then * DC 1 into top of wedge (i.e. the last ch of the prev row). DC 1 in next ch
HTC 1 in next ch, TC 1 in next ch, DTC 1 in next ch, TTC 1 in next ch, skip next DC; repeat from * to end, but replace last TTC with a 2TTCtog in last ch and last DC of prev row. Change to colour B on last step of 2TTCtog. Turn.
R3: ch 1, DC 1 in first st, * ch 6
1 DC in 2nd ch from hook, 1 HTC in next ch, 1 TC in next ch, 1 DTC in next ch, 1 TTC in next ch
skip 5 sts, 1 DC in next st; repeat from * to end. Turn.
R4: rep R2.
Rep last two rows once more with colour C. Change to colour D on last step of last row.
Finishing the square:
R1: ch 1, DC 1 each st until 1 st remains. [DC 1, ch 1, DC 1 ] in last st.
Do not turn, but work 18 DC evenly down next side. Work [DC 1, ch 1, DC 1 ] on corner. Do not turn, but DC 1 into the bottom of each ch. Work [DC 1, ch 1, DC 1 ] on corner. Do not turn, but work 18 DC evenly down next side. Work [DC 1, ch 1, DC 1 ] on corner, then join to first DC of round with a sl st. Fasten off and cut yarn, do not turn.
R2: Switch to smaller hook. Attach colour B to any st of Row 1, DC 1 in each st, working [DC 1, ch 1, DC 1 ] around the ch 1 corners.
Sew in ends and wet block.
Written pattern copyright Eline Alcocer 2017.
You are welcome to make and use this pattern as you wish, but please do not sell the pattern nor claim the pattern as your own.
You are welcome to sell items made using this pattern as long as the designer, Eline Alcocer, is clearly credited at the Point of Sale.
Please link back to this page if you write about the pattern in any way.
You may not reproduce, either partially or in full, any of the photos or the text contained in this pattern and tutorial without obtaining written permission from me first.
Thank you and happy crocheting!


